How to build a Headstone with Light Up Letters

Instructions on how to build a headstone/tombstone with letters that light up. A great way to fill dead spots in your haunted house or yard (no pun intended).
Skill Level: Medium
Approximate Time: 4-6 hours
Approximate Cost: $30 - $35 (US)
Dimensions: 18" W x 23" H x 6" D
Last Updated: October 6, 2008
READ OUR DISCLAIMER BEFORE ATTEMPTING ANY PROJECTS ON THIS SITE.
HOW TO HALLOWEEN IS ONLY LIABLE FOR TWO IDIOTS, AND NOBODY ELSE.
Getting Started
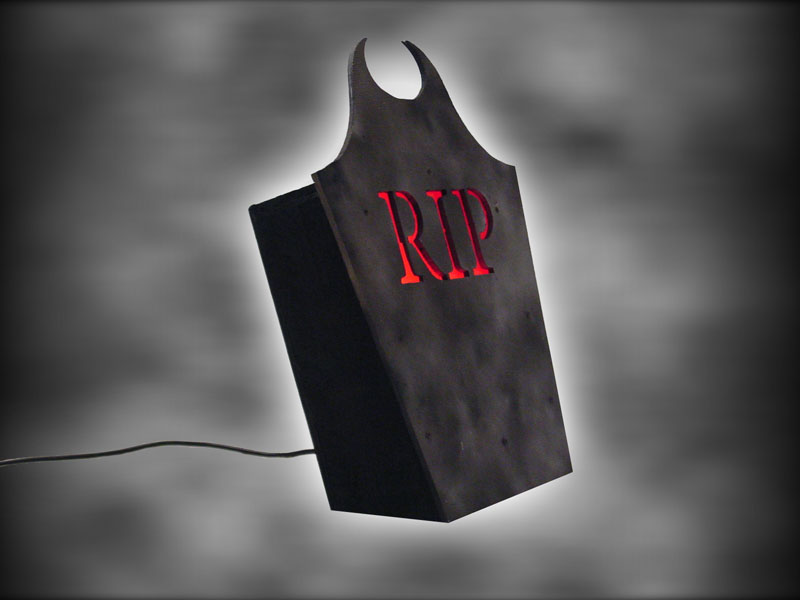
Headstone Light Boxes add a cool and eerie effect to your haunted house or yard. Once you understand the process to build one, simply repeat it for as many times as you need in order to fill up your graveyard. They look even better if you can get foggers to blow fog in front of them, as the letters shine through for that added bit of creepiness.
Here's an overview of the steps you will take during this project:
- Creating the face of the headstone
- Creating the box of the headstone
- Putting it all together
- Changing the light bulb
Be sure to read this entire set of instructions before even walking into the garage or workshop. In doing this, you can familiarize yourself with the steps involved, and better prepare for production.
Tools You Will Need
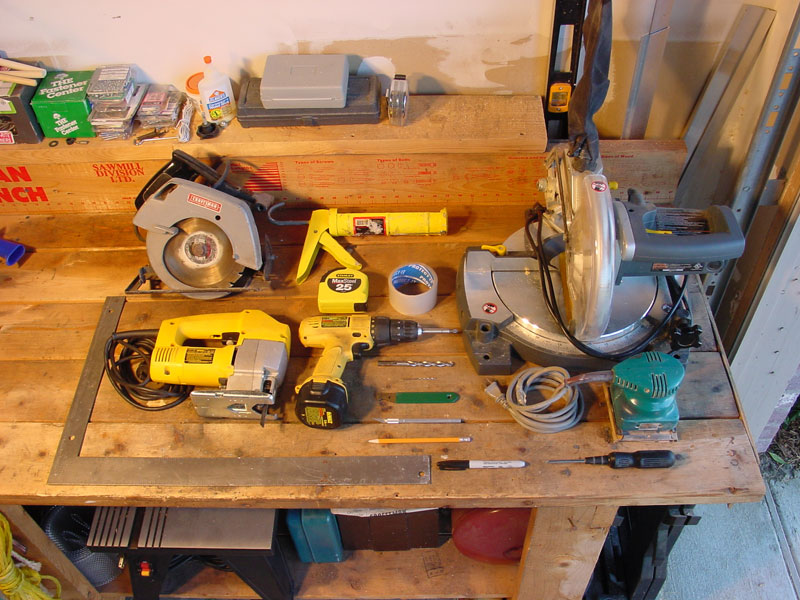
Required Tools
- Electric Drill w/Phillips Screw Bit
- 3/32" and 3/8" Drill Bits
- Jigsaw
- Circular Saw
- Caulk Gun
- Plastic Sheet Cutter
- Tape Measure
- Fine Point Sharpie Marker
- Pencil
- Exacto knife/Razor Blade
- Scotch Tape/Clear Packing Tape
- Square or Triangle
- Palm Sander
- Safety Goggles (not shown)
- Adobe Reader (to open and print PDF downloads)
Optional Tools
- Saw Horses (not shown)
- Miter Saw
Materials You Will Need

- Headstone face & RIP letters template (PDF download)
- 7 Sheets of 8 1/2" x 11" printer paper for templates
- (26) 6 x 1 1/4" long Drywall Screws
- (1) 2' x 4' x 11/32" or 3/8" thick plywood
- (1) 5/8" x 5 1/2" x 6' Rough Pine Picket
- (1) Sheet of 11" x 14" Plexiglas
- (1) Can Spray Paint – Flat Black
- (1) Can Spray Paint – Flat Gray
- (1) Can Spray Paint – Flat White
- (1) Light Bulb (any color, we'll use a red one in this example)
- (1) Phenolic Pony Cleat Lamp Holder
- (1) 8' long 16 Gauge Black Power tool Replacement Cord
- (1) Tube of Caulk (for waterproofing)
- (1) Tube of Contractor Adhesive (or Liquid Nails)
- (1) Roll of Scotch Tape (not shown)
- (1) Sheet of General Purpose sand paper (not shown)
Creating the Face of the Headstone
Step 1 - Tracing the face of the headstone
- Print out the six (6) sheets that make the face of the headstone from the PDF template. While you're at it, print out the "RIP" letters template as well.
headstone_template.pdf - Arrange the sheets from the headstone face template just like the diagram shows, making sure that the grid lines and the headstone outline all match up. Note that the pages will overlap.

- Tape EVERY edge of the papers together so they form one solid sheet. It is okay if the tape overlaps the outline of the headstone.


- Once you have taped all of the pages together, cut out the headstone face along its dotted outline with scissors or an exacto knife.

- Place the paper headstone template on the left and top edges of the plywood. Trace the outline with the marker, being careful not to move the template. When you are finished you should have an outline of the headstone face on the plywood. Save the paper template of the headstone face and use it to build more headstone lightboxes.


- Measure out two marks to align the next template for the "RIP" letters. Measure 3 11/16" from the left side of the plywood and make a mark. Next, measure 6" from the top of the plywood and make a mark. The left and top of the RIP template should match up with these marks.


- Cut the "RIP" letters of the paper template so the template is intact and the letters are removed from the paper.

- Lay the template down so the top and left edges line up with the marks you made in Step 1F. Trace the outline of the letters with the sharpie marker.

- When you are finished, the full traced headstone should look like the photo for this step.

Step 2 - Cut the letters of the headstone out
- To make things a little less frustrating, we'll cut out the letters first. Position the plywood on the saw horses so that you are within a few inches of each side of the headstone shape. This will reduce the vibrations as much as possible when drilling and cutting the "RIP" letters.
- Start each letter by drilling a hole slightly bigger than your jigsaw blade, close to the outline for each shape of the letters, (the 3/8" drill bit should be big enough). When you are finished, you should have five holes in each of the five shapes that make up the letters "RIP".


- To prevent the small spaces between letters from collapsing and breaking apart, cut the letters in order of the number sequence shown.

- Start at the drilled hole and ease your way to the outline of the letter. Be sure to not try and take corners or curves too fast or in a single cut or you will dramatically increase the chances of breaking the jigsaw blade or splintering the plywood.


- When you are done, you should have fairly clean cuts for the letters "RIP".

Step 3 - Cut the face of the headstone
- To cut the headstone shape out, start with the hole at the top of the headstone first. Start in on one side, and follow it all the way through to the other side. Be sure to take the curve slow so the wood doesn't splinter and you don't risk breaking your jigsaw blade.


- Then, cut the bottom left side of the headstone by starting at the bottom and following the cut all the way through.


- Once the cut is done, start in from where you left off and finish the left side.

- To cut the right side of the headstone, start at the bottom, but follow the line all the way through to the edge of the plywood.


- Then, start in from the outline where you left off and complete the right side.

- Cut the final bottom strip off and you've completed the cuts for the face of the headstone.


Creating the Box of the Headstone
Step 4 - Measuring & cutting the sides
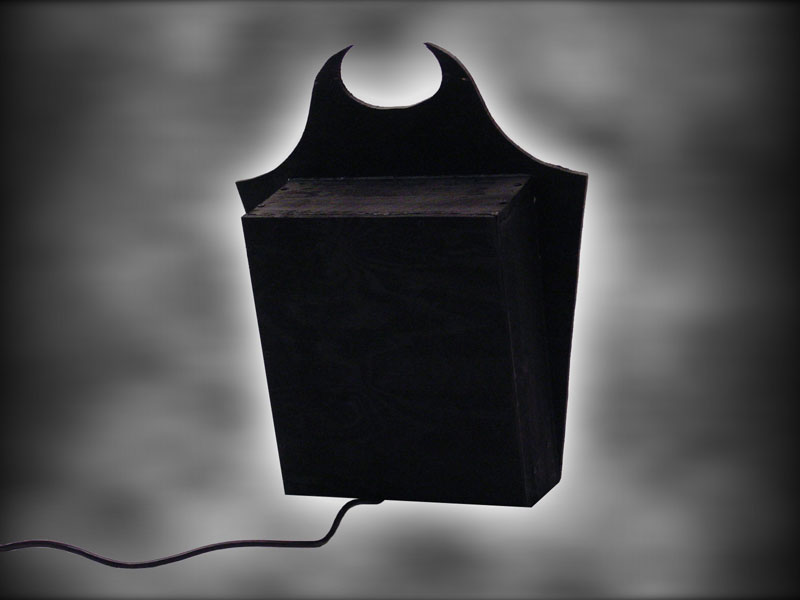
In this step, we will create the sides of the box. The sides are angled on the bottom to allow the headstone lightbox to rest back on itself when fully assembled.
- With your square or triangle, measure and draw a line 16" from the bottom corner on the back of the headstone face. Repeat for the other side. These will be the placement guides for the sides of the headstone box that we will make from the fence plank.

- Next, measure down the edge of the plank's length from the bottom (side that does not have the dog-ear) and mark two measurements at 14 1/2" and 30 1/2". On the other side, mark off two measurements at 16" and 30 1/2"


- Connect the two measurements of 16" and 14 1/2" using any straight edge. This will create an angled line like in the photo. Next, connect both of the 30 1/2" measurements. This should make a vertical line. When you are done, you will have two marks that look like photo.

- With your circular saw or miter saw, make the cuts where you made the two marks.

Step 5 - Measuring & cutting the top and bottom
- Use the measuring tape on the remaining portion of the fence plank, measure 12 1/2" from the edge you last cut and make a mark. Make the cut with your circular saw or miter saw.
- Next, measure 11 1/4" on the remaining portion of the fence plank for the base of the box. Cut with your circular or miter saw.
Step 6 - Pre-drilling the holes
- Before we go any further, line up the 4 pieces we just cut along the guides on the back of the headstone face. Start by standing the sides up along the guides, then fitting the top and the bottom to make sure that your cuts and measurements are as close as possible. The general assembly of the box should look like the photo. Remove the 4 pieces so we can start pre-drilling the holes for the screws.

- On the sides cut in Step 4-D, make a mark 13" from the top (the flat side that is a 90 degree angle). Once you've made a mark, measure in 1 1/2" from each side and make an intersecting mark.

- On the end of the top, measure down 1 1/2" from each side and make your marks. Then, measure in 5/16" from the other two sides and make those marks. Repeat for the second side. These marks make the points where the screws will go to hold the top of the box.


- On the plank that was cut at 11 1/4", measure in 1 1/2" from each side on the ends and make your marks. Then, measure in from the other two sides on the ends to make marks at 5/16". When finished, your marks should look like the photo.

- Prop this piece on something (two pieces of scrap wood work fine) and center the light base on it. Screw the light base into board. A portion of each screw should stick out a little bit. If so, break the tips off with a pair of pliers.


- Using the drill and 3/8" drill bit, drill a hole for where the cord will go. To make it easier to connect the wires from the cord, we set it off to the side in between the two connectors of the light base.


- On the board for the top, measure 5/16" from the ends and make the marks. Then, from the other ends, measure in 1 1/2" on each side and make the intersecting marks. When complete, you should have marks that look like the photo on each end of the top board.

- Once you've made all the measurements, use the drill with the 3/32" drill bit to drill all the holes.


Step 7 - Assembling the box frame
- Using the guides of the headstone face that are drawn on the back, lay down the pieces for assembly by first lining up the sides to the guides and the bottom of the headstone face.

- Match up the holes on the bottom piece to the holes on the sides. Screw in the screws to attach the sides to the bottom piece.
- Next, turn the piece around to screw the top on to the sides.

- When you are done, your box should look like the photo.

Step 8 - Assembling the back of the box
- Lay the assembled box frame on the remaining portion of the plywood, lining it up with the bottom left corner of the plywood. Be sure that the shorter side of the angle for the bottom of the box frame is the part that faces down onto the plywood. Also, let a little bit of the box frame hang off of the edge of the plywood (1/8" or so).


- Mark the outline for the back by simply tracing the outline of the box. Using the circular saw or jigsaw, cut the back out of the remaining plywood.


- Line up the plywood back to the box and mark the drill holes for the screws. You will need 3 on each side (left and right), 2 for the top, and 2 for the bottom. For the sides, measure down from the top down marking 3 marks on each side at 1 1/2", 7" and 12".


- For the top, measure from the left hand side and mark 4" and 9".

- From the top, measure down 13 5/8", this should be the center for the bottom board of the box frame. Then, from the left hand side, measure 4" and 9" just like we did for the top.


- Next, use the 3/32" drill bit and drill to make the pilot holes for the screws. Screw in the screws to complete the back assembly.


Step 9 - Assembling the light fixture
- Start by putting the open ends of the wire through the hole that was pre-drilled for it on the base.

- Unscrew the leader screws on the light base enough to get the wire ends underneath them.
- Curl the ends of the exposed wire.


- Wrap the curled ends of the exposed wire around the screws of the light base and tighten the screws.

- Note that the white wire is the hot wire. Connect the hot wire to the hot leader screw. This is typically the screw that is gold/brass and is also the screw that connects to the plate that touches the bottom of the light bulb.

- Screw in the light bulb and turn on for a test.

- Unplug the cord, take the bulb out and turn the box around with the cord trailing under the back. We recommend cutting a notch at the bottom that is just slightly bigger than the width of the cord. By doing this, it will somewhat protect the ends of the cord getting pulled out from an accidental trip or two (we know – we've done it several times running after trick-or-treaters). Mark where the cord should come out of from the bottom.


- Feed the wire ends back through the hole and reconnect to the light base. Work the cord back through the notch to test.

Step 10 - Assembling the front of the box
NOTE: You'll notice that our headstone face is already painted in the photos. This was to save us time in making this how to article. You will actually not paint the face until the next step.
- Turn the box on its back and place the headstone face on the box frame, lining up the bottom edges so they are centered and flush with the face.

- From the bottom measure up the one of the sides and make small marks at 4", 8 1/2", 14 1/2". Be sure that your tape measure is in the center of the box frame so you only have to mark once.

- Estimate the center of the face and measure from the bottom up making small marks at 3" and 16 5/16".

- With the 3/32" drill bit and the drill, make pilot holes at the marks you just made. Screw the face to the box frame with screws and the face is completed.

Putting It All Together
Step 11 - Paint the face of the headstone
- Remove the headstone face from the box frame and paint the entire front of the face gray. Make sure to cover the edges on the outside of the face, and the inner edges of the letters. When complete, you should have a solid gray coat of paint on the front of the face. Do not paint the back!

- Once dried, we're ready for the effects painting. For the first coat, quickly spray back and forth with black spray paint to slightly dirty up the solid gray coat. If you do too much, you can always fix with a few sprays of the gray. Be sure to spray a little heavier in certain areas to where you almost get a cloud effect.

- For the second coat, use the white spray paint in the same fast manner to add a few highlights and complete the stone effect. Spray heavier in certain areas to pull some of the white spots out from the gray and black.

- Repeat this process as often as necessary to achieve the desired result. The more times you repeat this, the more layers of black and white start to create the illusion of stone. Although, you can over do it, so be careful. We did about 3 layers of black and 3 layers of white in this example.
- Once completed, set aside and allow to completely dry.
Step 12 - Apply the Plexiglas
- Once the face is completely dry, screw it to the box frame and then remove the back of the headstone box. Place the headstone face down.

- Measure on the Plexiglas 6" from the top of the 11" side. Make a line that goes all the way across at 6" the entire length.
- Using the right angle or a straight edge, take the plastic cutter, press and drag from the top to the bottom. Make sure you are standing at an angle that the cutter won't hit you. Repeat the cuts until you notch out a little more than half of the sheet of the Plexiglas width.

- Once you have cut the Plexiglas, line up the cut with the edge of a tool bench or shelf. Place one hand on the end to hold it down, and use your other hand to press the hanging piece to snap it off.


- When finally cut, make sure that all protective film is removed from the Plexiglas. Use your palm sander with general purpose sand paper on one side of the Plexiglas to frost it. Keep going until you can't see detail of your hand through the other side. This will allow the light from the bulb to make the letters "glow" instead of showing the inside of the box in detail.


- Using the contractor adhesive (or liquid nails), place beads around the edges of the letters and inside edges of the box frame in a sparing manner to prevent bleeding of the adhesive through the letter holes.

- When you are done, press the Plexiglas into place by firmly pressing on each of the beads one by one.

Step 13 - Sealing the headstone
- Screw the light bulb back in and test it one last time. After you see that it works, reattach the back by screwing in the screws. Use the caulk to seal up each and every crack of the face, box frame, and plywood back.


Step 14 - Finishing Paint
- Once the caulk has dried on the surface, paint the entire back with the black spray paint. Spray the face directly from the back so you don't get too much black on the front. Remember it's hard to fix the paint on the front when Plexiglas is in place! You can use the same technique to paint the back as we did to paint the front. We leave the back solid black since it's hard to see it at night anyway.


Changing The Light Bulb
- Using a razor blade, cut a deep line in the caulk where the plywood back meets the back of the box frame.
- Unscrew and remove the back.
- Change the bulb and reattach the back.
- Before resealing, you should be able to easily peel off the existing caulk line for the back of the headstone light box. Removing the old caulk will allow for a cleaner seal when applying the new caulk.
- Re-caulk the back to reseal the headstone. Let the caulk dry.
- Use black spray paint to paint over the caulk.