How to build Old Fence Panels
Instructions on how to easily make aged, storage friendly fence panels for your haunted house or yard. A quick and easy way to beef up your haunted experience, without killing storage space.
Skill Level: Easy
Approximate Time: 15 minutes per fence panel
Approximate Cost: $0 - $3.50 (US) per fence panel
Dimensions: 36" W x 42" H x 1" D
Last Updated: October 22, 2006
READ OUR DISCLAIMER BEFORE ATTEMPTING ANY PROJECTS ON THIS SITE.
HOW TO HALLOWEEN IS ONLY LIABLE FOR TWO IDIOTS, AND NOBODY ELSE.
Getting Started
Old fence panels are a quick and easy way of adding impressive presence to your haunted house or yard. Once you understand the process to build one, simply repeat it for as many times as you need to build the desired fence length.
When I built my first 16 panels, it only took 4 hours to complete the project from the first thought of the idea and developing a template, to driving in the last screw of the last panel. I should also mention that I did it with just a circular saw making each individual cut, one at a time. If you use a miter saw, you can make multiple cuts at the same time to greatly speed up production.
The steps for this project are organized into three main sections:
- Measuring and Cutting the Pickets
- Finishing the Fence Panel
- Installing and Removing the Fence Panel(s)
Be sure to read this entire set of instructions before even walking into the garage or workshop. In doing this, you can familiarize yourself with the steps involved, and better prepare for production.
Before we jump right in to this project, remember one thing: DON’T WORRY ABOUT PERFECTION! With some exception on the cuts for the wood, this particular project actually looks much better if you don’t concentrate on being too precise. Most Halloween decorations that are created in this manner tend to look more "authentic" since they are not meant to look precise, but old and used.
Tools You Will Need
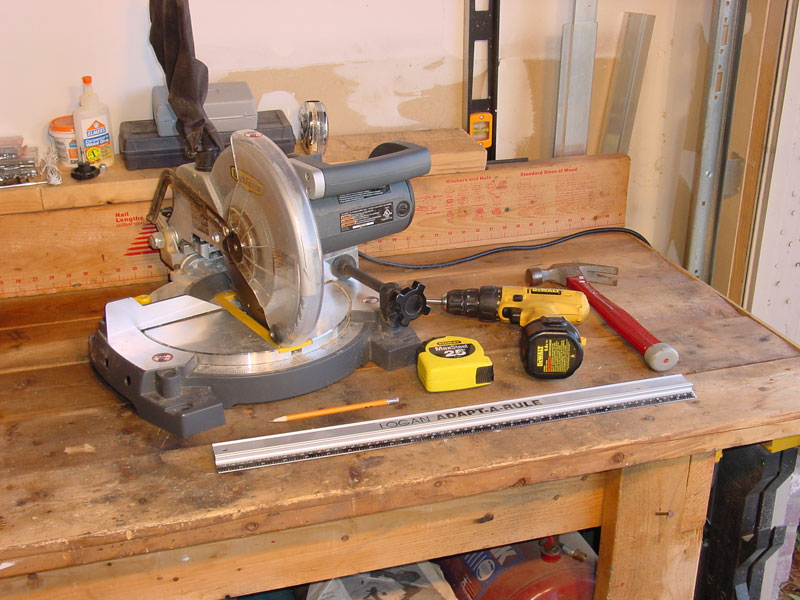
Required Tools
- Pencil
- Tape Measure
- Straight Edge
- Drill w/Philips-head Screw Bit
- Circular Saw (not shown)
- Saw Horses or Large work space (not shown)
- Hammer/Mallet/Sledge Hammer
- Safety Goggles (not shown)
Optional Tools
- Miter Saw
Materials You Will Need
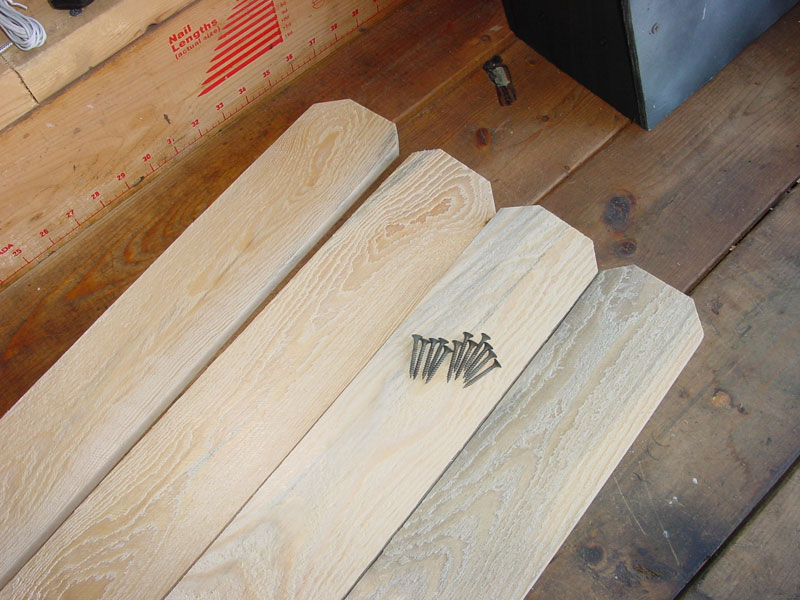
- 12 Screws
- 4 Wooden Fence Pickets **
- (1) Can Spray Paint – Black (if purchasing new wood pickets)
** Material Tip: Contact a local fence contractor to see if they have recently taken down any old fences. Most of the time, they will either have old fence wood at their place of business, or direct you to their customer’s location where they have left the old fence wood for bulk trash pickup. Doing this will save you the cost of the wood, time and cost to spray paint, and it also makes the fence panels look more authentic.
Measuring and Cutting the Pickets
Step 1 - Measuring and cutting the first two pickets
- First measure 36" from the bottom of two of the four pickets.

- Make the cuts with your miter or circular saw.

- You should now have 4 pieces of fence pickets that are approximately 36" each. Set them aside for now.
Step 2 - Measuring and cutting the remaining two pickets
- From the bottom, measure and make marks at 36" and 42".

- Estimate the center of the 42" measurement and make an intersecting mark.

- Use the straight edge to draw a line from each edge of the 36" mark to the center point of the 42" mark. When you are finished you should have a triangle marked off just like in the photo for this step.

- Using the miter or circular saw, make a vertical cut on the 42" mark for each picket. You should now have two pieces that are approximately 30" in length. Set them aside with the other pickets.

- Next, cut the diagonal lines on the other two pieces with a circular saw to create a pointed side. You should now have two pickets that will be the "stakes" of the fence panel.

Finishing the Fence Panel
Step 3 - Assembling the fence panel
- Layout the fence panels by first placing two of the 36" pickets across a saw horse or your work space. These will be the braces that hold the upright pickets together. From outside edge to outside edge, they should be approximately 24" apart.

- Take the two "stake" pickets and lay them on the braces with the pointed ends facing down. Leave enough room on both sides of either picket to place an additional picket.

- Then, layout the remaining pickets on the braces in a random and tilted order. As you lay them out, make sure they aren’t placed below the 36" marks that are left on the staked pickets.

- Screw the upright pickets to the braces. Use one screw for each point where a picket overlaps the brace below it. When you are finished, you should have two screws on each picket (one in each of the two braces below the picket).

Step 4 - Touching up the panel
- If you have used old fence wood, skip to Step 5. You’re ready to install the fence panels!
- If you have used new wood, you’ll have to make it look old. Do this by quickly spraying black spray paint over the entire panel. Remember, they will look different and much darker at night, so spray just enough to make the wood appear dirty, (do not fully coat them).


Installing and Removing the Fence Panel(s)
Step 5 - Installing the Fence Panel(s)
- Determine where your fence line is going to be. We recommend installing the fence panels about 8 to 12 inches from sidewalks, driveways, etc. This greatly reduces the chances of trick-or-treaters snagging costumes on them, and usually clears any possible underground lines like phone or cable lines. In any case, we strongly recommend that you call your phone, cable, electrical, and any other company necessary, to be absolutely positive that you are clear of damaging any such lines.
- Once you’ve determined your fence line, lay each fence panel side by side on the ground. The point of each stake should be lined up with your fence line. Leave space between them to stretch the distance they must span, but not so much distance that people (especially curious children), can walk between them.

- Remove the staked pickets from the panel with your drill. Then, use a hammer, mallet, or sledge hammer to drive them into the ground at the location of where they must be for when the fence panel is reassembled. Drive them into the ground until the mark from the pencil (if it’s still showing) touches the ground level. The stakes will be driven approximately 6" into the ground.

- Re-assemble the fence panel by resting the panel right up against the stakes you hammered into the ground. Screw the stakes into the braces of the panel using their original holes (if they don’t match up it’s not a problem – the sloppier it looks, the better effect you will get for a worn fence panel). Repeat with the remaining panels to complete your haunted house fence!

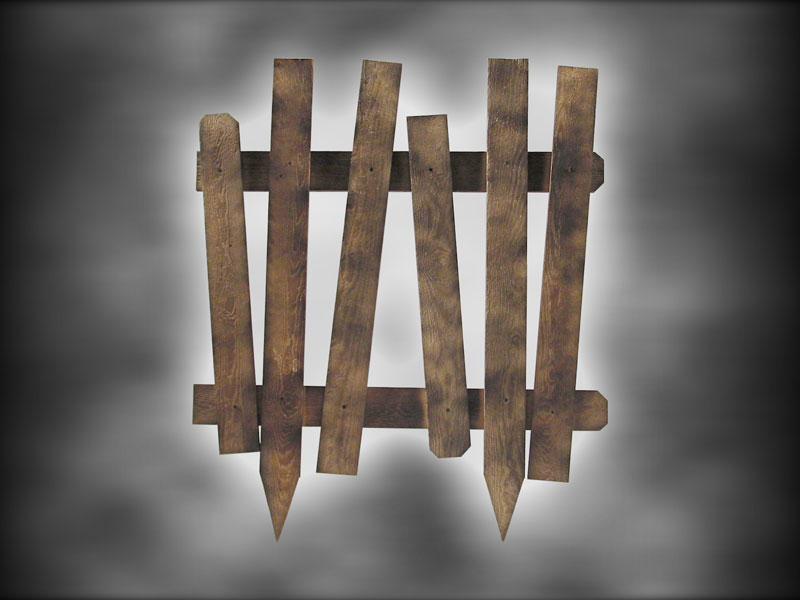
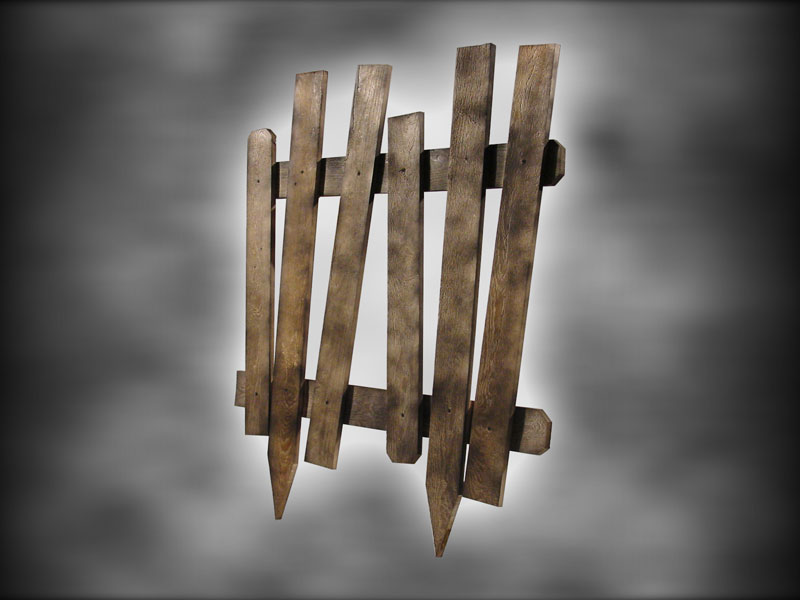
- Here's the finished product:

TIP: If the ground of your yard is extremely dry or hard, we suggest watering or soaking the fence line the night before installation. This will make installing your fence panels the next day much easier and reduce the chances of splintering and cracking pickets when hammering. Installing fence panels directly after watering could cause the soil to pack, making the holes much bigger than expected and cause your fence panels to wobble.
TIP: To speed up installation, have one person start at one end of the fence line and detach the staked pickets from the panels. Once they have a panel completed, have a second person go behind him/her and hammer the staked pickets in the ground. The first person (or a third person) can then come back behind the second person to reassemble the fence panels in their upright position.
Step 6 - Removing the Fence Panel(s)
- To remove the fence panels, simply pull them straight up and out of the ground. Be careful not to rock them back and forth too much as it can weaken the screws of the panel.
- You will notice that there will be quite a few annoying little holes in the ground that are left. Simply fill them with dirt and pack, and the grass will grow back before you know it (we do it every year and never see holes from the year before).